Teacher
Getting started
What happens when you log in the first time?
If your school has a Single Sign-on connection or GAR connection to Lingua Attack, or the user accounts for your school have already been created, the usernames and log-ins for both teachers and students are handled directly by this protocol. Once your admin sends you your connection ID, you can enter Lingua Attack as a teacher. If you have access to more than one teaching language, you will be asked to select the language you are teaching (which you can change later on). You will also be asked for your name and surname. These details are solely for display to other teachers and students in your institutions; they are never forwarded to, or reused by third parties. You can also choose to not enter your name and use "Mr." or "Mrs" instead. Subsequently, popup tutorials will guide you through the home page. You should contact your administration if you have any questions about usernames or passwords.
If instead your school has been given access codes for teachers and students, those users now have to create their individual user accounts on the platform.
* As a teacher
When you click on Login on the Lingua Attack page at lingua-attack.com, click on "Have an activation code but haven’t created your account yet?", then enter your activation code. You will be asked to choose a username and a password, and your first name and surname. This is purely for identifying yourself to your students on the platform, and this information is not used in any other way.
* For your students
If your school administration has provided you activation codes for your students, you must now distribute them so that each student can create his or her user account on the platform. When each student goes to the Lingua Attack page at lingua-attack.com, they should then click on Have an activation code but haven’t created your account yet? and enter their activation code. They will be asked to enter their real first name and surname, for the purpose of you and other teachers being to identify them on the platform, so it is very important that the students complete these fields seriously. As soon as the student activates his or her access code in creating a user account, that student will appear in your Students list for the school (accessible via the Student Management shortcut on your Teacher Panel or the Students tab of the My School menu), and visible to all other teachers of your school using the platform.
Where do I find my students?
If your organization has assigned you to one or more Administrative Classes (see section on Types of Classes), you will see the students in those classes by viewing the class in My Classes.
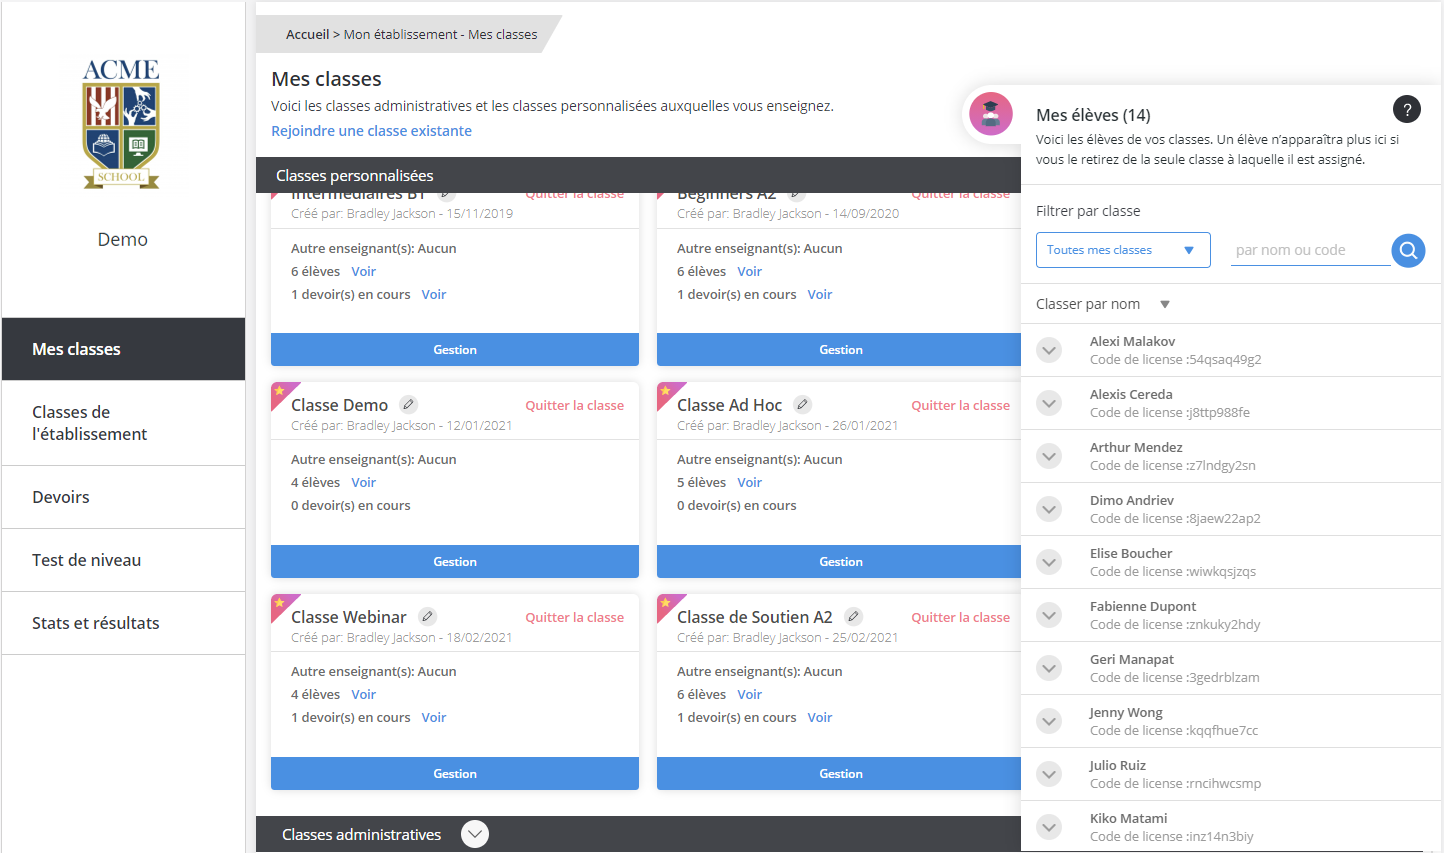
For Custom Classes:
You can find the students in Administrative Classes assigned to you by viewing those classes in the Administrative Classes area of the My Classes section. You can find the students in Custom Classes you are already teaching by viewing those classes in the Custom Classes area of the same section. When your school’s students are all present and visible on the Students page, select the students you wish to place into the classes you will be teaching by clicking on the circle (so that a blue plus sign appears) or in the check box next to each student’s name. You can access the Student list directly from the home page or via the My School menu.
From the Home page, select "Student Management" from the Teacher Panel.
From the My School menu, select Students.
Types of Classes
There are two types of classes on the platform:
Administrative Classes are classes defined by your organization’s administration (if any) and set up on the platform via Single Sign-on protocol or the user account creation implemented from the .csv it has provided. Teachers and students are assigned to these classes by your organization. Teachers not already assigned to an Administrative Class can join it if they need to, and then can give the class assignments and schedule assessment tests, but they cannot modify its name, or add or remove students or other teachers from the class. Teachers cannot create or delete Administrative Classes.
Custom Classes are classes or groups created by a teacher, who names the class and places students in it. The class or group can be joined by other teachers. Teachers can create or delete such classes or groups as needed. If your organization has not defined any Administrative Classes, teachers will only see the Custom Classes they have created or joined.
How do I create a Custom Class?
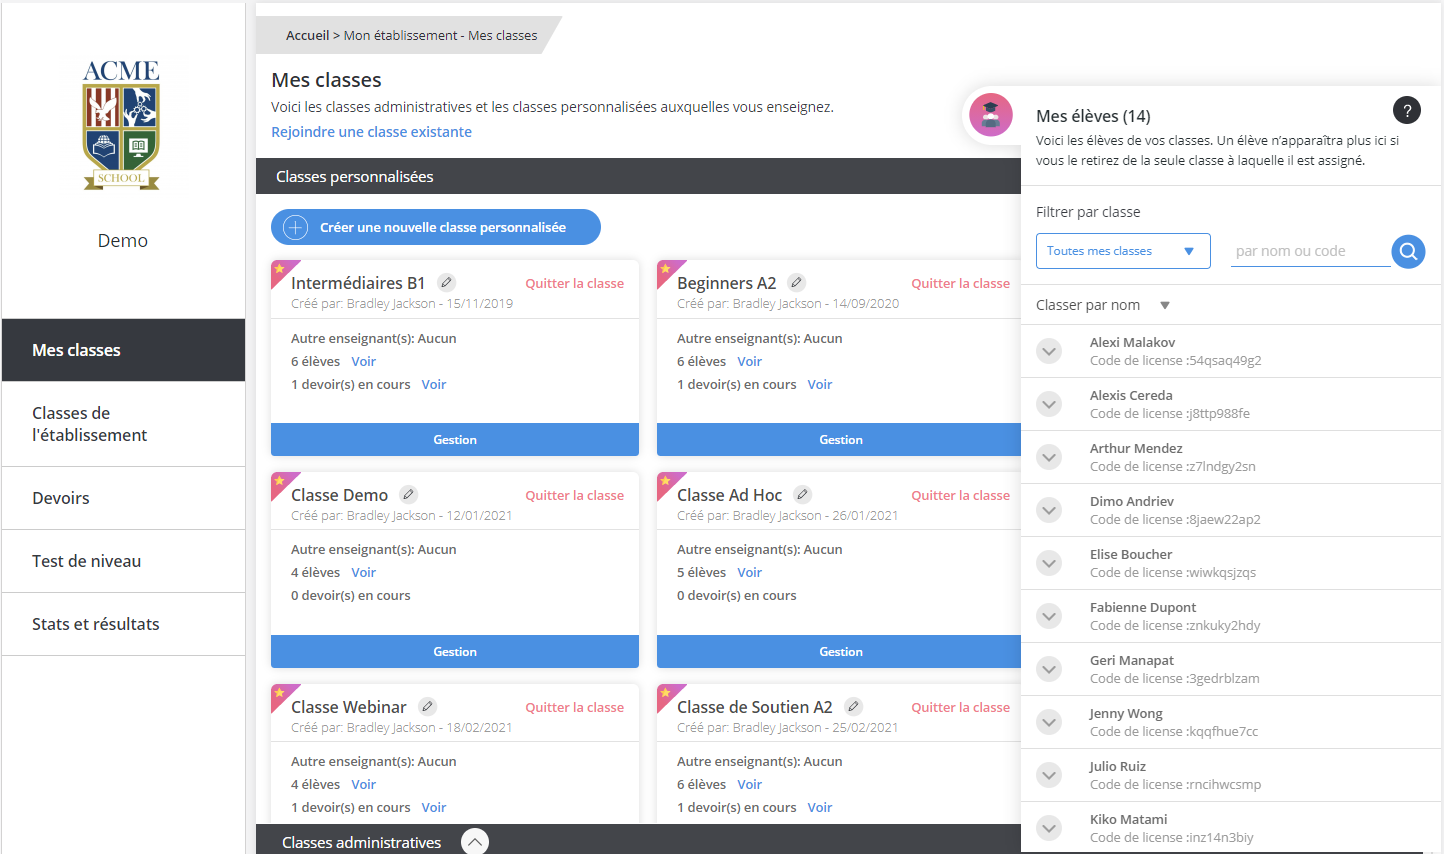
To create a new Custom Class, select “Create A New Custom Class” at the top of the My Classes section. Choose a name for the class, and then select the students to add to the class. You can filter the student list by Teacher (students already in a class with a specific teacher) or Class (students already in a specific class). You can also use the search function to search for specific students by name or - if they have used one - licence code.
How do I know the level of my classes?
The Assessment Tests on the platform are designed according to CEFR guidelines. To know the proficiency level of the students in your classes, you can assign an Assessment Test to each class. Knowing the level of your students will enable you recommend or assign exercises adapted to their needs. All the exercises on the platform are accessible to everyone, but when creating assignments you can filter exercises by difficulty level or grammar point. Based on the level of each student, you can choose to place them into classes or groups by level and move them to higher-level classes or groups as they progress.
You can also access usage statistics, or - if a learning unit was included as part of an assignment - see students’ scores on that unit as well as their progress in completing the assignment (Not started, In progress, Finished).
How do I set the language for my courses, the site interface and the translations?
The Learning Language is the target language: the language you will be learning. It can be changed - if you have access to more than one learning language - by clicking on the Change Language button.
The interface language is the language in which the site is navigated - all instructions are given in this language. You can change the interface language to any one of the 26 languages available, unless your school has imposed the Learning language as the interface language.
The translation language enables you translate words (besides keywords) inside a learning unit, as with a dictionary. You can change the translation language to any one of the 26 languages available.
How do I change my personal data?
Your personal information can be found by clicking on the Account and Profile menus items.
Navigate to these sections to change your username, first and last name, and other personal information.
To learn more about your personal information, click here